


Surviving a Remodel
By Kari Richardson
March 2023 View more Featured
From dust to dust-ups, here’s how to pull through and persevere

No one said remodeling was going to be easy. (And if they did, they weren’t telling you the truth.)
From struggles to stay on time and budget to the mess and inconvenience, completing a remodel has the potential to try your patience and fray your relationships if you aren’t prepared. “The first three weeks of a project can be rough,” says Janice Teague, senior designer at Glen Ellyn–based Drury Design. “That’s the time when [contractors] are doing the demolition. It’s dusty, and there’s not much to see.”
But take heart: Teague, who has helped countless clients through the process, says it gets easier once materials such as flooring, tile, and appliances begin to come together. “At that point you are seeing the transformation into a beautiful space,” she says. “That’s when it can be really exciting.”
Your sparkling new kitchen or posh primary bath awaits at the end of the remodeling rainbow. To help you live through it all, consider these tips for managing the decisions, the dust, and the inevitable disagreements.

1. Timelines Are Tentative
During her 20-year career, Naperville designer Angela Graefenhain, owner of Graefenhain Designs, has seldom seen a project where the timeline stays perfectly on target. Materials are delayed, contractors get sick, and homeowners sometimes fail to plan ahead. In other words: Life happens. And while the reasons vary, budgeting for extra time can help avoid disaster later. “Don’t plan a wedding reception or a graduation party for the day after the contractor said your project would be done,” she says.
Speaking of timelines, design professionals recommend allowing ample time for the planning and design phase of a project—four to five months at a minimum, but as much as a year is ideal. “I sometimes have clients contact me saying, ‘We’re starting our kitchen remodel in a month,’ ” says Leah Phillips, designer and owner at Leah Phillips Interiors in Wheaton, adding that a month isn’t enough time to order materials or finalize a design.
2. Choose the Right Contractor
Getting multiple bids is a no-brainer. Go a step further and make sure you are comparing “apples to apples,” says Rachel Alcorn, principal and owner of Glen Ellyn–based Two Hands Interiors. Contractors have different pricing models, so find out what’s included and what isn’t to make sure you’re getting the deal that best fits your needs.
Alcorn suggests evaluating proposals using quality, price, and speed as criteria. Aim to get at least two of these met by determining your pain point. For example, are you willing to wait longer for the project to be completed in order to gain a more reasonable price? Or would you prefer to pay more for a speedier due date?
And don’t forget to check contractors’ experience with similar projects, especially expertise in cabinetry, kitchen, or bath remodeling, which can be tricky. “If your goal is to do a lot of custom millwork and the contractor hasn’t done that before, you might not be happy at the end of the day,” Phillips says.

3. Jettison Your Junk
There’s no need to box up the spices you’ve had since 1986 or the inherited dishes you never liked anyway. Now’s the perfect time to purge. Get rid of any expired, broken, or unloved items before construction starts to make it easier to move back in at project’s end.
Project No. 1
Primary Bath Plans Pivot During Makeover
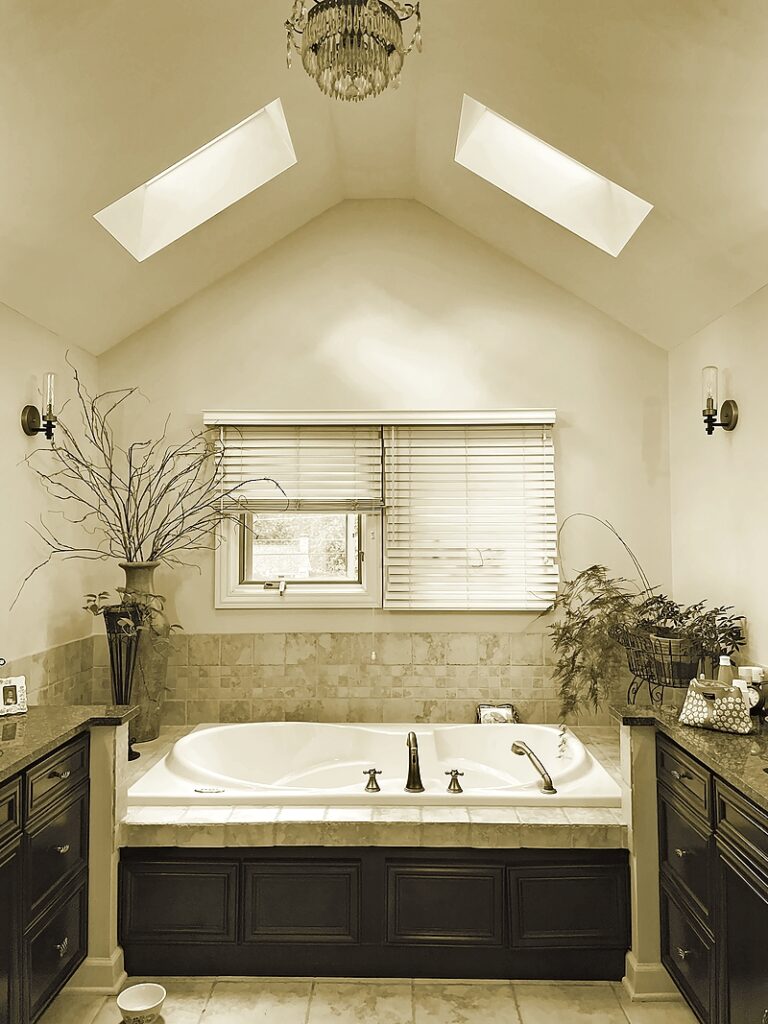
The mission was to lighten and brighten a dated Glen Ellyn master bathroom with an expansive update, but the project hit a glitch. A shower wall that was to be outfitted with a window was found to be load-bearing.
“Once you open up walls, expect the unexpected,” says Leah Phillips, designer and owner of Wheaton-based Leah Phillips Interiors, who designed the new bath. She and her team quickly adjusted and were able to include a smaller window in the design, which features symmetrical double blue-gray vanities by Matthew James and Co. of Hinckley.
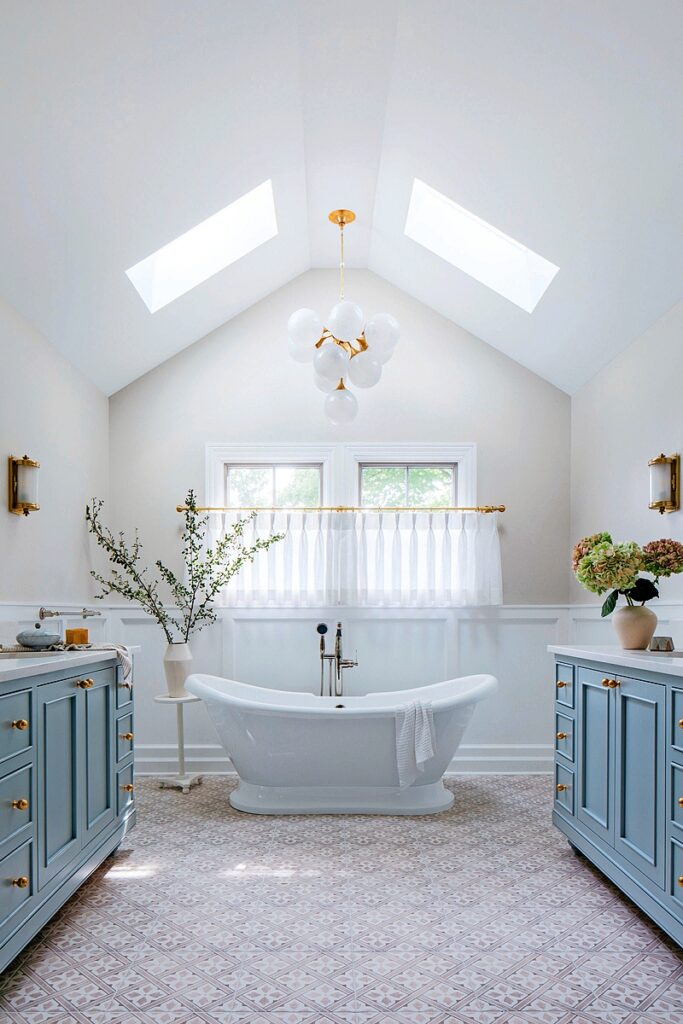
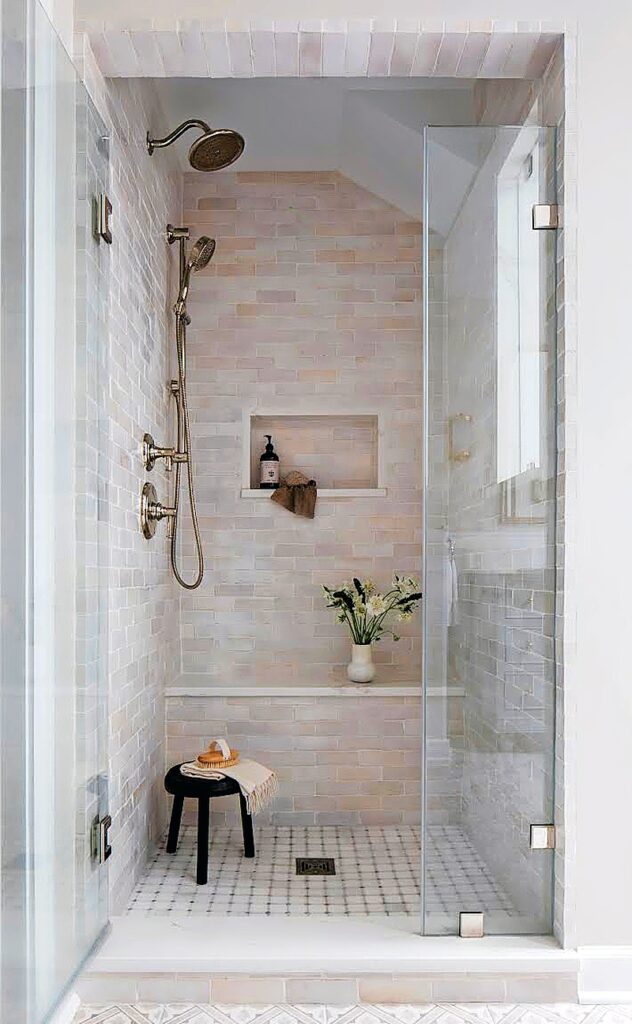
Crisis averted, Phillips helped the homeowners select handmade zellige tile for the shower and porcelain Laura Ashley floor tiles for an Old World feel. An existing deck tub was replaced with a new soaker tub, topped by a memorable chandelier from Visual Comfort. Custom-made café curtains add softness and let in plenty of sunshine.
Light, bright, and airy, this pretty master bathroom is now mission complete.
Project No. 2
Compromise Completes the Kitchen
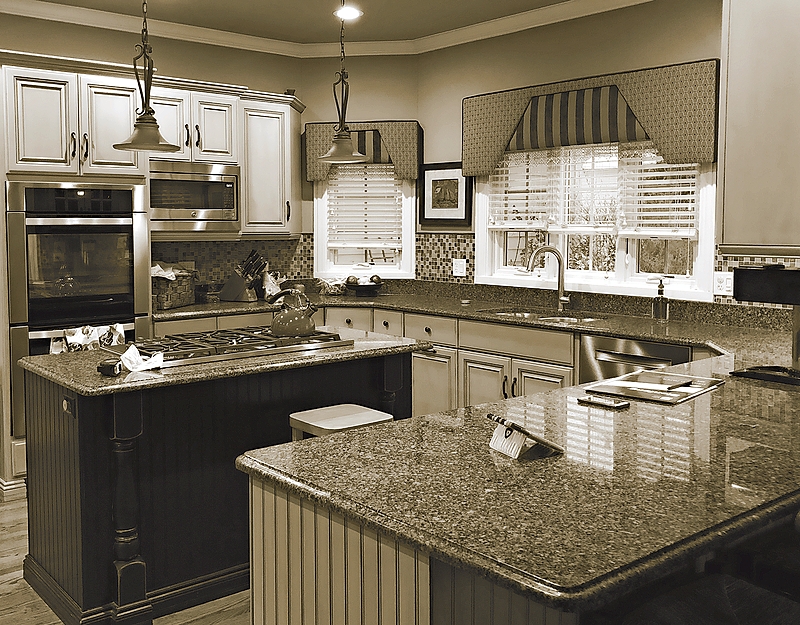
Drury Design’s Janice Teague has a special fondness for this recently completed Naperville kitchen remodeling project.
Contractors removed a wall between the main kitchen and a breakfast room in order to make space for a new, improved layout. Two walnut islands by Rutt Cabinetry divide the room into distinct areas for cooking and entertaining.
The clients, empty nesters who enjoy cooking and entertaining, made things easy by clearly signaling each time they saw a product they liked.
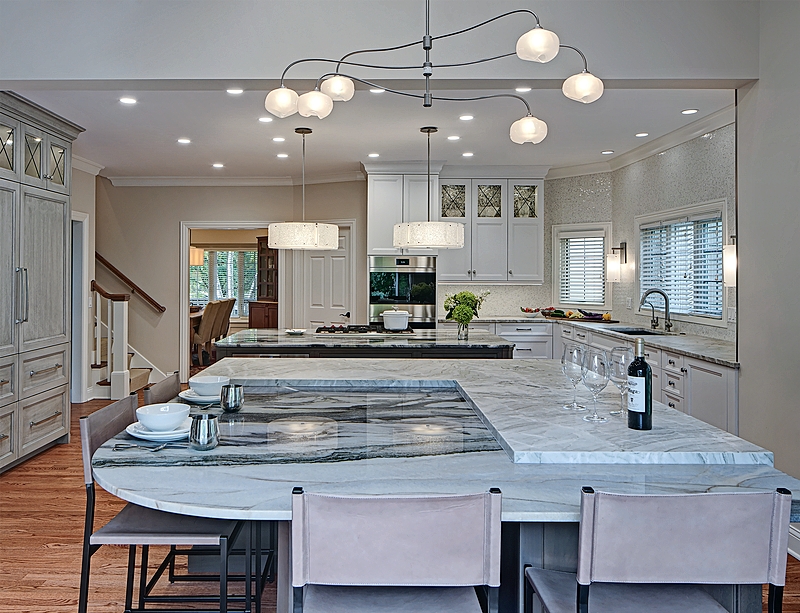
Countertops? It was love at first sight when they laid eyes on two slabs of quartzite, one lighter and one dark. And they stopped in their tracks when Teague presented them with quarter-inch marble mosaic tiles that resemble a wave when laid in a swirl pattern.
The situation was a little more complicated with a modern-looking lighting fixture that now hangs over one of the two islands. One partner was crazy about it, but the other wasn’t as sure.
In the end, the wife gave the green light to her husband’s much-loved chandelier, a gesture of compromise that is the secret of any good remodeling partnership.
4. Be Decisive Upfront
For some, the trickiest part of remodeling doesn’t involve drywall dust or meals prepared in the garage—it’s making decisions. If you struggle to make choices, try limiting yourself to a few options or giving yourself a set timeline—say three days—to decide, whether you are choosing paint colors or the size of a sink.
If you’ve hired a professional to help, perform due diligence and then do your best to trust your decision and their guidance. Carefully review portfolios ahead of time to make sure your styles align and check references. If you still find yourself questioning every piece of advice, it may be time to loosen your grip.
“Once you’ve made your final selections, and materials are ordered, put away the idea boards and stop looking,” says Gladys Schanstra, owner and creative director at Drury Design. “Last-minute changes cause more stress and often open up the chances for errors and mistakes.”
5. Set Up Temporary Digs
“Do you normally Zoom in for work meetings from your kitchen? Does the whole family use the family room for different reasons? If you’re remodeling your kitchen or family room, you’ll need to plan where else in the house your family can live life in the meantime,” Schanstra says.
Kitchen remodels tend to be the most disruptive. Set up a makeshift version in a basement or other area with essentials such as a fridge, microwave, toaster oven, air fryer, coffee pot, and Crock-Pot. Minimize the number of times you eat out by preparing and freezing meals ahead of time or grilling out.
6. There Are No Dumb Questions
Graefenhain has learned that if something doesn’t seem quite correct during the construction phase, don’t be afraid to speak up. She once had a client question something when her windows were being installed—and a significant error was caught as a result. “She said, ‘This doesn’t look right. I’m as tall as the top of the window,’ ” Graefenhain recalls. It turns out the windows were being placed incorrectly. Thanks to the phone call, the contractor was able to fix the mistake quickly, saving time and money in the process.

7. Accept That Construction Is Messy
When selecting a contractor, make sure your candidate has a solid plan for mitigating dust and debris: Will they seal off the area with zippered plastic and use filters to suck up the muck as they work?
While most tradespeople aim to leave the job site “broom clean” at the end of each workday, realize that your home is likely to be dirty and dusty during construction. Prepare by boxing up precious objects and removing them far from the construction area.
Wall and floor sanding are notoriously messy, but even more benign remodeling tasks can leave your place feeling seriously unkempt. Neatniks may want to seek some space from the noise and chaos by getting out of the house. If the project involves the majority of your home or the roof being removed, consider a temporary move or a strategically timed vacation.
8. Stick to Your Budget
Be aware that contractor quotes may offer allowances for items such as lighting or tile that don’t necessarily fit your situation. Dig deeper upfront to find out specific costs for the exact materials you are considering.
Those detailed quotes from tradespeople and contractors will help you stay on budget, but even so, ask them to warn you if any surprises arise that may affect your final cost. “Quantify the unexpected,” Graefenhain says. If, for example, a wall you intended to remove turns out to be load-bearing, you’ll need to decide if you should alter the design to keep the wall in place or instead incur the extra costs of engineering and installing replacement supports.
Leaving a little extra padding in your budget for the unexpected provides peace of mind, which is exactly what you’ll need during a remodel.
Noting that outdoor projects are not as disruptive as indoor ones, Bruss says those adding patios, paths and other hardscapes should still expect some dust and mess. “The payoff is worth it, though,” she says.

9. Meet in the Middle
Families with a knack for compromise often have a smoother experience during remodeling. That’s because it’s almost inevitable that partners prefer different cabinetry, colors, or some other project detail. They also may clash over practical matters such as which contractor to hire or how much to spend. Give-and-take is key in these situations.
Phillips often finds herself in the role of mediator, balancing the desires of two people. During a recent project, one spouse favored style while the other was more focused on durability and cost. “I do my best to make both partners happy,” Phillips says. “Each of them is my client.”
Know where you are willing to bend—and what is nonnegotiable, Alcorn suggests. If you have the budget, a good designer can help you figure out how to blend aesthetics. “A lot of what we do as designers is helping partnerships meld two styles together into a cohesive plan,” she says.
10. Know the Order of Operations
Most remodeling projects follow a set plan that proceeds from demolition and site prep at the beginning to installation of appliances and fixtures at the tail end. Learning the order “helps you predict what will be needed in each step,” Graefenhain says. “If you know that order, you can stay a couple steps ahead.”
If you find yourself unprepared when materials or fixtures are needed, your project comes to a screeching halt. Worse yet, you could lose your tradespeople to another job if they have nothing to do.
Project No. 3
Muddy Yard Becomes a Paradise

The new owners of this circa-1950s residence in south Naperville contacted Tillie Bruss of Downers Grove–based Tillie Bruss Landscapes for help with drainage problems.
While the couple appreciated the trees in their new backyard, they found the space to be frequently wet and dirty, with ponding water after storms. What’s more, their two large dogs often returned to the house muddy after trips outside, creating indoor messes as well.
A key part of the solution were walkways and a 1,200-square-foot patio Bruss designed using Everblue pavers, a porcelain product made for outdoors. The space is divided into areas for grilling and eating, as well as for lounging by the pool the couple plans to add this summer. The addition of the patio and paths, as well as improved grading, has solved the couple’s drainage issues, Bruss says.
Photos from istock and Getty Images. (top) Bathroom photos courtesy of Leah Phillips Interiors (before) and Margaret Rajiv (after). Kitchen Photos courtesy of Drury Design (before) and Eric Hausman (after). Yard photo courtesy of Tillie Bruss. Illustrations by Robert Neubecker
